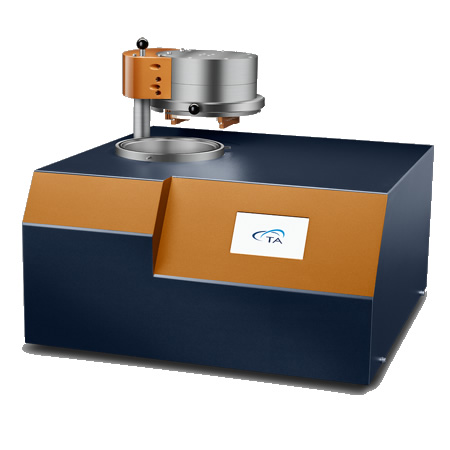
Optical Dilatometer
A versatile instrument for thermal expansion and contraction measurements, DIL 806 uses an innovative measurement principle to make unconventional experiments possible, and to improve many conventional tests .
Sales PromotionsThis optical dilatometric measurement method used in DIL 806 is an absolute process, entirely independent of any possible expansion or contraction of the instrument. Consequently, measured results do not need to be corrected or calibrated for different temperature programs. Coupled with the fast response of the DIL806 furnace, this makes the system particular well-suited for the analysis of dynamic processes that involve multiple temperature steps and dynamic heating rates.
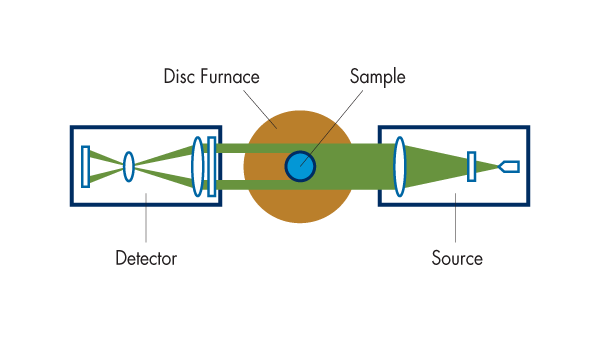
A high-performance LED emits a broad-width planar light beam onto the sample. The sample shadow is detected by a high-resolution CCD sensor. The signal is then evaluated by a digital edge-detection processor which provides a sensitive and precise measurement of dimensional change. This principle is known as the shadowed light method and provides an accurate and absolute measurement of the sample dimension with changing temperature.
The sample, positioned on a platform in the center of the disc-shaped furnace, is not subjected to external forces. Hence DIL 806 is a dilatometer particluarly suited for the measurement of metals and, with the optional sub-zero furnace, plastic samples.
Thin samples are also easily analyzed with the sample holder specifically designed for this purpose.
The broad width of the incident light means that sample preparation is not as demanding as in other classic dilatometric techniques, and the sample does not need to have be positioned precisely on the platform, improving usability also for unexpereinced operators.
The initial length is automatically determined and saved for the subsequent calculation of the linear thermal expansion coefficient.
The furnace is capable of rapid heating speeds up to 100 °C/min and cooling times from 1400 °C to 50 °C in under 10 minutes.
| Sample length: | 0.3 – 30 mm |
| Sample height: | max. 10 mm |
| Change of length: | max. 29 mm |
| Length Resolution: | 50 nm |
| Temperature Resolution: | 0.1°C |
| Accuracy in α: | 0.03 x 10⁻⁶ K-1 |
| Temperature range: | -150°C to -600°C |
| Atmosphere: | Vacuum, inert gas, air |
Optical Dilatometric Measurement
Optical Dilatometric Measurement
Contact-less dilatometric measurements allows the sample to freely expand/shrink without any interference due to mechanical contact. This results in a more precise determination of specimen’s dimensional changes as well as of the temperature at which the events are detected. Also, the lack of any load due to the contact with a measuring system enables to extend the analysis well beyond softening point into the melt, and also analyze soft sample that would otherwise be impossible to test.
100μm tall detection area
100μm tall detection area
Thanks to the focused LED beam, sample’s area subject to the dilatometric measurement is100μm tall across the length of the entire sample. This results in a significantly simplier sample preparation because, unlike in classic dilatometry, both the planarity of sample’s faces and their surface roughness are not critical to the precision of the measurement
Temperature uniformity across the sample both horizontally and vertically
Temperature uniformity across the sample both horizontally and vertically
The sample is located in the center of a disc-shaped, fast response furnace. The design ensures a thorough temperature homogeneity of the temperature across the entire sample over the entire temperature analytical range also at fast heating/cooling rates.
Absolute measurement method requires no calibration and no correction
Absolute measurement method requires no calibration and no correction
Shadowed light method is an instrisically absolute method where the measurement of sample’s dimensional changes is not affected by the dimensional changes the instrument measuring system is subject to depending upon tests’ temperature profiles. Hence DIL 806’s results being a very flexible and productive tool when tests methods require different heting/cooling profiles because there is no need to run and save calibration and/or correction curves
Environmental control
Environmental control
DIL 806 highly effective control on the envrionmental conditions during a test enables users to analyze sample not only in air but also under vacuum and in inert atmosphere, a key requirements for the analyisis of metals and metal-alloys
Metals - Thermal expansion of thin film
Metals – Thermal expansion of thin film
Traditionally, the measurement of a thin film in a push-rod dilatometer can be problematic due to the contact forces associated with the push-rod. The DIL 806 optical dilatometer is ideal for characterizing thin films and other materials with sample size/preparation restrictions. In this example, the thermal expansion and phase transformation of a thin steel foil is characterized by the DIL 806 non-contact optical dilatometer. The measurement process is both absolute and non-contact, so no system calibration curves are required. Sample holders are available to support thin films.
Fast fired ceramics
Fast fired ceramics

The very fast heating rates, outstanding temperature uniformity and simple programming inherent to the DIL 806 make it ideally suited to simulating industrial processes. The fast-firing process of a green body ceramic is desirable because it conserves energy and time. However, in many cases, this type of heat treatment can produce incomplete densification in the final product. In this example the sample is rapidly heated until it reaches a user-defined contraction. At this time, multiple isothermal dwells and cooling rates were used in order to closely monitor the sintering behavior of the material. By fine-tuning these temperature control parameters, based on dilatometer measurements, the industrial process can be streamlined to produce a final product with the desired physical properties and cost-advantageous processing conditions.
Introducing the Optical Dilatometer


